Set up the project and the @element loop
 ▶ Watch the source video
Before any prompt craft, you build the thing that makes a whole commercial hold together: an organized project and a library of named @element assets that Claude can reference by name. This is the consistency backbone every later lesson stands on.
💡 Dotted words are definitions
Any underlined term has a plain-English definition. Hover on desktop, tap on mobile.
✅ Quizzes keep score
Each section ends with a check. Your score sits in the top bar; a tally waits at the end, then a report you can send back to your teacher.
Three steps, any product
The presenter (Adil) frames the entire build as three steps: assets, setup, generations. "Today it's a car, but the same workflow works for pretty much any commercial. Sneakers, perfume, whatever you're selling. You just swap the assets." 1:38
That reframing is the reason this is worth learning as a repeatable system rather than a one-off: the same pipeline produces an ad for any Alexana or client product. This lesson is step one, and the smallest possible slice of it: get organized, and save your first asset so Claude can use it.
What are the three steps of the pipeline, in order?
One folder per asset type
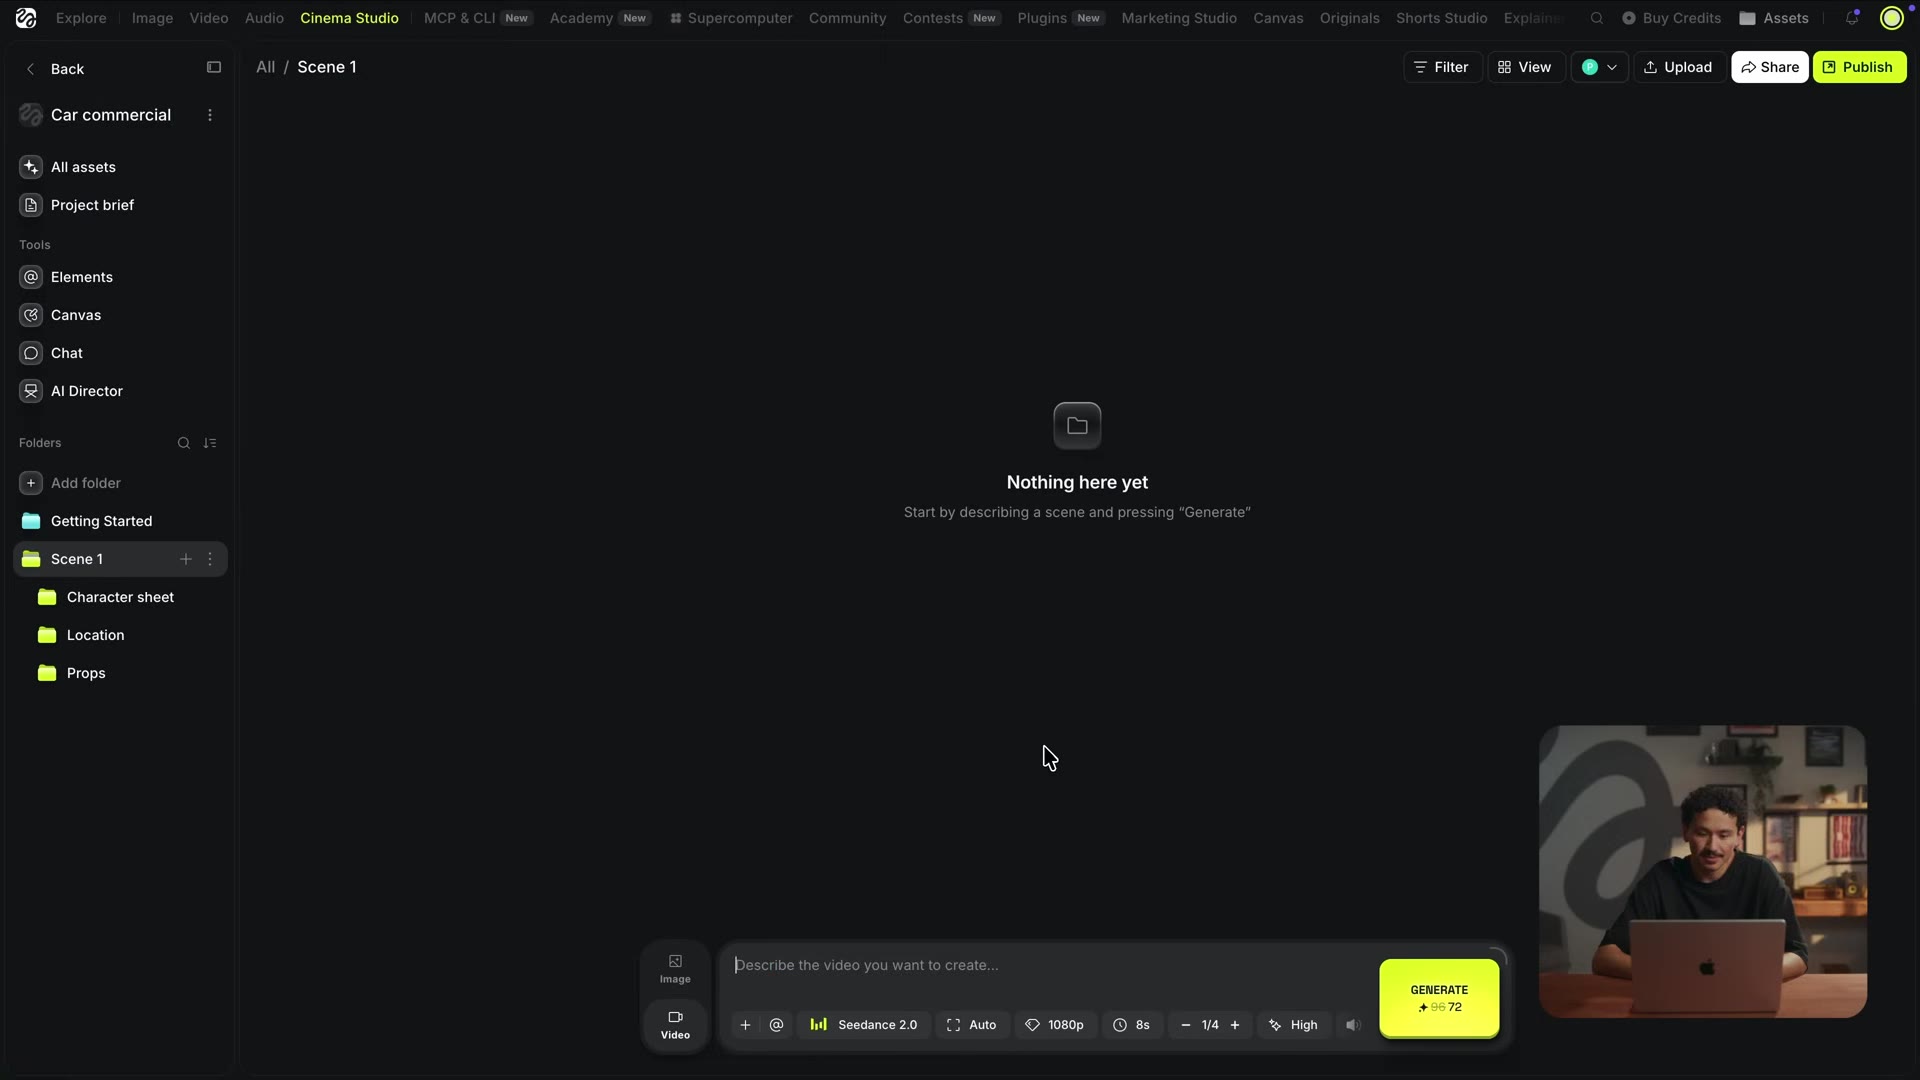
In Cinema Studio, the presenter makes a project called "car commercial", then a main folder per scene and a subfolder per asset type, with a fresh subfolder for every iteration. His justification is blunt: "Sounds tedious, but a few hundred generations in, it's the only way to find anything." 2:10
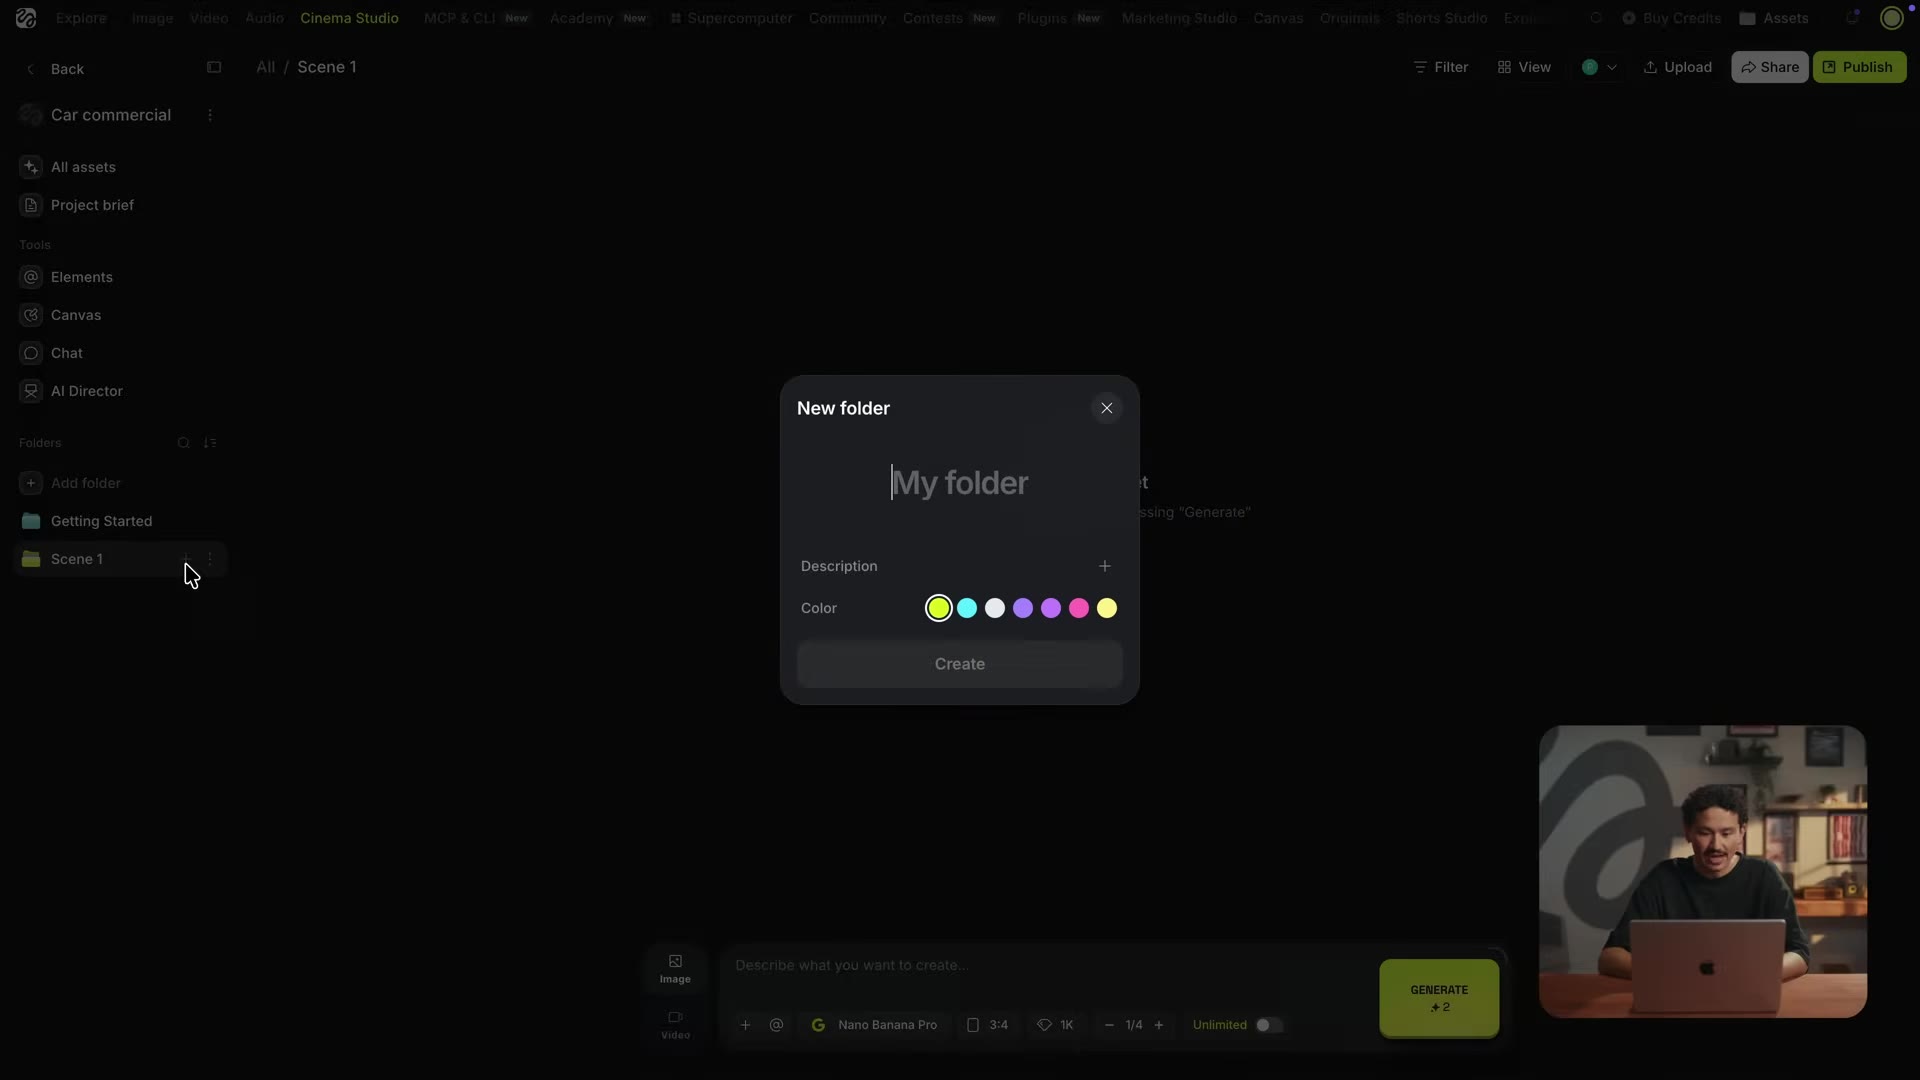
He also states a product-shot rule that matters later: generate the hero product on a plain neutral gray backdrop. "It makes them way easier to blend into any background later." A gray-backdrop asset is a clean cut-out you can drop into any scene.
Why generate the hero product on a neutral gray backdrop?
Save it as an @element, then tell Claude its name
This is the single most important habit in the whole course. Every time the presenter likes an asset, he does two things: he saves it in Higgsfield as an element with a name starting with @ (the car becomes @car_sheet), and he attaches the same image into Claude and tells it the name.
"From now on, Claude writes car_sheet into its prompt, and when I paste the prompt back into Higgsfield, the element attaches itself. I do this with every single asset in this video."The @element loop - the reason consistency survives hundreds of generations. 2:35
@car_sheet element. Naming it and attaching the same image to Claude is what lets Claude reference it later.jump ▶Why it matters for your work: without this, every generation is "regenerate and hope." With it, your car, your lead's face, your locations, and your props become a referenceable library. Claude writes the name, the paste re-attaches the exact asset, and the same car shows up in shot after shot.
@name re-attaches it on your account before you build a whole library around it.What does saving an asset as a named @element and attaching it to Claude achieve?
Try it (2 minutes)
- Open Cinema Studio and make a project with a Scene 1 folder plus subfolders for Character sheet, Location, and Props.
- Generate one hero product shot on a neutral gray background.
- Save it as an element named
@yourproduct_sheet, attach the same image to Claude, and tell Claude the name. - Ask Claude for a one-line test prompt that mentions
@yourproduct_sheet, paste it into Higgsfield, and confirm the element attaches.
Stuck or seeing something different on your plan? I'm your teacher for this course - ask me and we'll adjust.
Your score
One-sentence summary
Get organized and turn every asset into a named @element that Claude can reference, and you have built the consistency backbone the rest of the commercial depends on.
Glossary
Every term marked with a dotted underline on this page.
Tell your teacher how this went
Lesson report
Pick how hard this felt, note anything confusing, and generate a short report to send back so the next lesson lands in the right place.